No products in the cart.
When it comes to glowing skin and deep relaxation, facial massage techniques with natural oils have been trusted for centuries. This timeless ritual not only relieves stress but also boosts circulation, promotes lymphatic drainage, and allows your skin to absorb nutrients more effectively. Whether you’re searching for an easy home facial, or simply want to learn essential facial steps that rejuvenate your skin, this guide will show you how to transform your skincare routine with the power of natural oils.
But here’s the twist: while most people know a massage on face feels good, few understand the right facial massage movements, the safest oils to use, or the at home facial steps that maximize results. Ready to discover the secrets of radiant skin hidden in these age-old practices? Stay with me as we explore facial massage with oil, break down each facial step by step, and reveal the best oil face massage methods that even luxury spas don’t always tell you.
Why Facial Massage Techniques Are Transformative
1. Stimulates Blood Flow, Giving Skin a Healthy Glow
One of the most powerful benefits of facial massage techniques is their ability to boost circulation. When you perform upward and outward facial massage movements, you gently stimulate the tiny blood vessels beneath your skin. This increased flow of oxygen-rich blood delivers vital nutrients to skin cells, instantly giving your complexion a healthy, radiant glow. Over time, regular massage on face helps even out skin tone and enhances your skin’s natural ability to repair itself.
2. Relieves Muscle Tension in the Jaw, Forehead, and Temples
Just like your shoulders and back, the muscles in your face hold stress. Tightness in the jaw, frown lines between the brows, or tension in the temples can all lead to premature wrinkles and fatigue. Through targeted methods of facial massage, especially around the jawline and forehead, you release this tension. A few minutes of gentle pressure daily can reduce headaches, soften expression lines, and leave your face looking more relaxed and refreshed.
3. Enhances Product Absorption of Serums and Oils
Applying skincare products alone is not always enough, the way you apply them matters. By incorporating facial steps with oils and serums into your routine, you encourage deeper penetration of active ingredients. The warmth generated by facial massage with oil helps soften the skin barrier, allowing antioxidants, vitamins, and hydration molecules to absorb more effectively. This means your products work harder for you, maximizing results from your home facial.
4. Encourages Natural Detoxification through Lymphatic Drainage
Your lymphatic system plays a key role in removing toxins and excess fluids from the body. Unfortunately, sluggish lymph flow in the face often results in puffiness, dullness, and fluid retention under the eyes. Specific facial massage techniques, such as sweeping strokes from the center of the face outward, stimulate lymphatic drainage. This helps reduce swelling, depuff under-eyes, and create a sculpted, refreshed appearance, one of the main secrets behind youthful skin.
5. Acts as a Stress Reliever for Both Mind and Skin
Beyond physical results, facial massage steps carry powerful emotional benefits. Stress hormones like cortisol directly impact skin health, often causing breakouts, dullness, or flare-ups of sensitive conditions. By practicing mindful, soothing massage on face routines, you lower stress levels and trigger the body’s relaxation response. This not only improves skin appearance but also promotes overall well-being, making facial massage a holistic treatment for both beauty and mental calm.
By combining the right facial massage techniques with natural oils, your home facial steps can feel like a spa treatment right in your living room.
Choosing the Best Oil for Face Massage
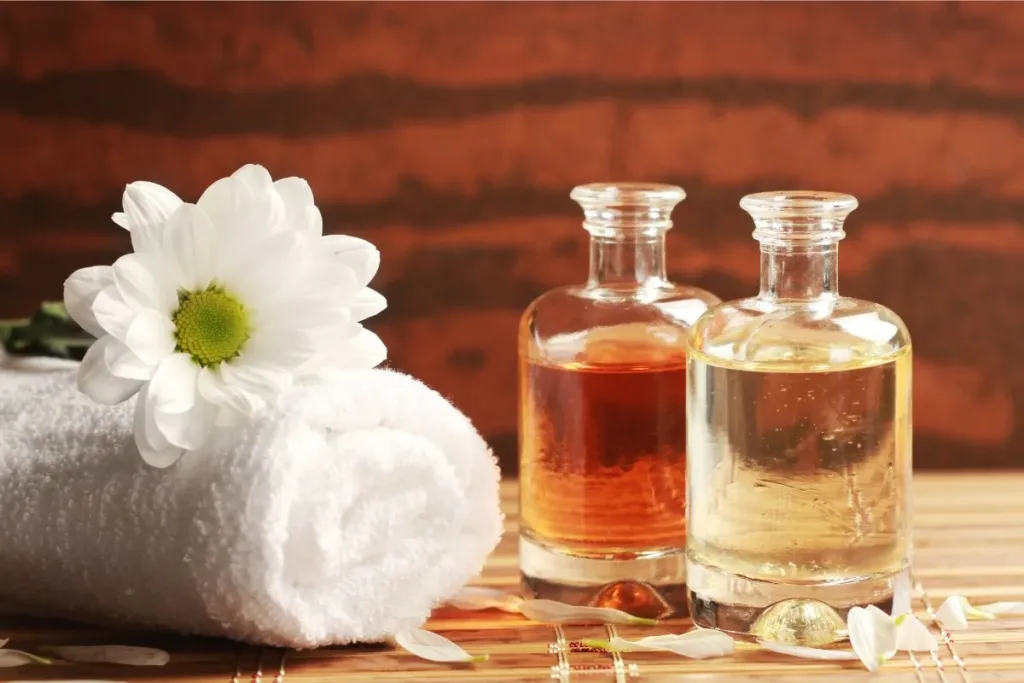
The success of your facial massage steps depends on selecting the right oil. Different oils benefit different skin types:
Dry Skin
For dry skin, argan oil, avocado oil, and almond oil provide deep nourishment. These oils are rich in fatty acids and vitamin E, which help restore hydration, strengthen the skin barrier, and leave your complexion soft and supple after facial massage techniques.
Oily or Acne-Prone Skin
If you struggle with oiliness or breakouts, lightweight options like jojoba oil and grapeseed oil are best. These non-comedogenic oils balance natural sebum production, reduce clogged pores, and allow you to enjoy massage on face without triggering acne.
Sensitive Skin
For delicate or easily irritated skin, rosehip oil and squalane are excellent choices. They soothe redness, calm inflammation, and provide gentle hydration, making them ideal for facial massage steps in a home facial routine.
Mature Skin
When targeting fine lines or dullness, pomegranate seed oil and olive oil work wonders. Packed with antioxidants, these oils fight free radicals, improve elasticity, and enhance radiance, giving mature skin a youthful boost during facial massage with oil.
This makes your facial massage with oil safer and more effective. Always patch test before use and avoid heavy comedogenic oils like coconut oil if you are acne-prone.
Facial Steps: Preparing for the Massage
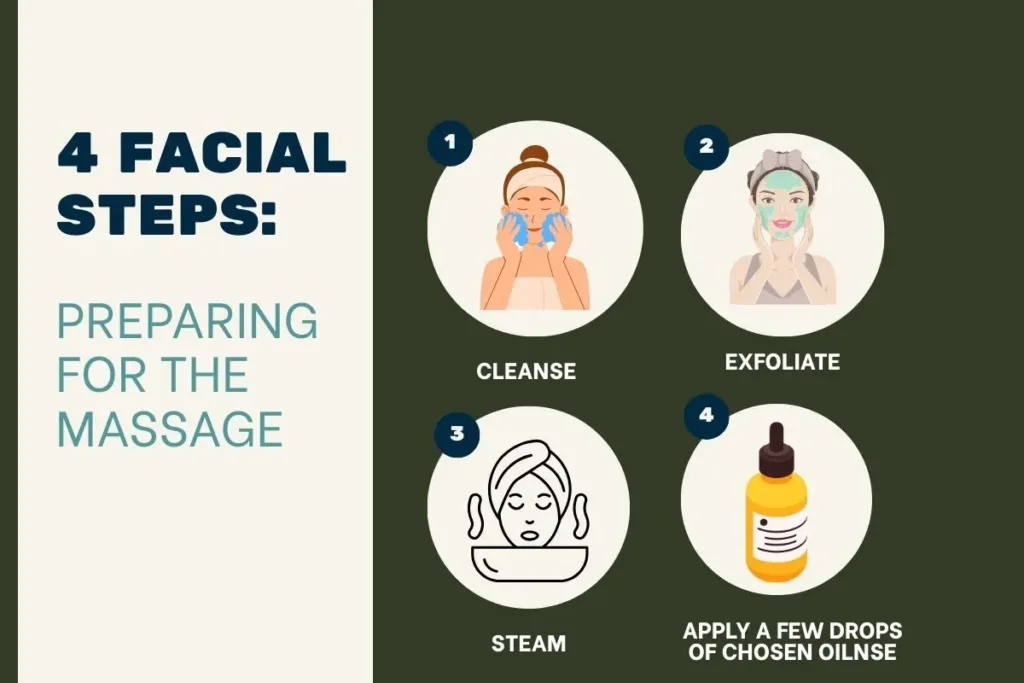
Before starting your facial at home step by step routine, preparation is key:
1. Cleanse
Every great home facial begins with clean skin. Cleansing removes dirt, oil, and makeup that can block pores and prevent oils from working effectively. A gentle cleanser ensures your facial massage techniques start with a fresh base, allowing nutrients to penetrate deeply.
2. Exfoliate (Optional)
Exfoliation is an important step in many facial steps because it clears away dead skin cells. A mild scrub or enzyme-based exfoliant smooths the surface of your skin, making it more receptive to oils and improving the results of your massage on face. Do this only 1–2 times weekly to avoid irritation.
3. Steam or Warm Compress
Steaming is one of the most relaxing at home facial steps. Warm steam or a simple compress softens the skin and gently opens pores, which helps oils and serums absorb better. This step also boosts circulation, preparing your skin to fully benefit from the facial massage movements that follow.
4. Apply a Few Drops of Chosen Oil
The foundation of an effective facial massage with oil is using the right carrier oil for your skin type. Warm 2–3 drops between your palms before applying this activates the oil, spreads it evenly, and enhances the glide for smoother facial massage steps without pulling or tugging the skin.
Now, let’s dive into the actual methods of facial massage.
Step-by-Step Facial Massage Techniques
Step 1: Neck & Jawline
- Purpose: Start lymph flow and warm the tissues so later facial massage movements glide without drag.
- Hand position: Place both palms flat on either side of the neck.
- Movement: Stroke upward from collarbone to just under the jaw; then use your knuckles to glide from chin → jaw angle → just below the ear.
- Reps & time: 6–8 long strokes up the neck; 6–8 knuckle glides per side; ~60–90 seconds total.
- Pressure (1–5): Neck 2/5; jawline 3/5 (firm but never painful).
- Breath cue: Inhale as you place hands; exhale during the upward stroke to release tension.
- Avoid: Pressing directly on the windpipe; racing—slow, steady strokes work best.
- Pro tip: If you’re puffy, finish each glide by feathering down the side of the neck toward the collarbone for lymphatic drainage.
Step 2: Cheeks
- Purpose: Lift the mid-face, boost circulation, and enhance absorption during your facial steps.
- Hand position: Index and middle fingers curved like hooks; thumbs anchor lightly near corners of the mouth.
- Movement: Small up-and-out circles from sides of the nose across the cheeks to the temples; then gentle sweep back toward ears.
- Reps & time: 2–3 passes per line, covering lower, mid, and upper cheeks; total ~90 seconds.
- Pressure: 2–3/5—enough to move tissue without dragging skin.
- Avoid: Rubbing aggressively over active acne—glide around those spots.
- Pro tip: For extra lift, pause at the apple of the cheek and hold a 2-second upward scoop before moving on.
Step 3: Under-Eye Area
- Purpose: Reduce puffiness and soften the look of fine lines—one of the most delicate facial massage techniques.
- Hand position: Use ring fingers only to minimize pressure.
- Movement: Dot a tiny amount of oil; tap from inner corner → outer corner along the orbital bone, then sweep up toward the temples.
- Reps & time: Two gentle tap-circuits + two sweeps per eye; ~45–60 seconds total.
- Pressure: 1–2/5—think “butterfly wing.”
- Avoid: Tugging the skin, pressing on the eyelids, or using essential oils here.
- Pro tip: Keep tools/cold spoons in the fridge; after tapping, run a cool roller from inner to outer for quick depuffing.
Step 4: Nose & Lip Area
- Purpose: Soften smile lines, ease tension around the mouth, and improve oxygen delivery.
- Hand position: Index fingers on either side of the nose; thumbs rest at the corners of the lips.
- Movement: Tiny circles down the sides of the nose; then trace the nasolabial fold (nose-to-mouth line) with upward, smoothing strokes; finish with a gentle lip outline sweep.
- Reps & time: 6–8 circles per side + 4–6 smoothing strokes per line; ~60 seconds.
- Pressure: 2/5 on the nose; 2–3/5 along smile lines.
- Avoid: Over-oiling the upper lip (can clog pores); keep movements small and precise.
- Pro tip: Add a brief pinch-and-release along the upper lip to relax overactive orbicularis oris muscles.
Step 5: Forehead
- Purpose: Release frown tension, soften “11s,” and create a lifted look—core massage on face work.
- Hand position: Fingertips together across the center of the forehead; or use knuckles for tight areas.
- Movement: Upward strokes from brows to hairline; then horizontal sweeps from the center outward. Pause between the brows and do tiny pressure pulses for 5 seconds.
- Reps & time: 6–8 upward strokes + 6–8 horizontal sweeps; ~90 seconds.
- Pressure: 2–3/5; between-brow pulses 3/5 if you hold tension there.
- Avoid: Dragging oil into the hairline (can feel greasy later).
- Pro tip: If prone to headaches, finish with slow “rainfall” taps across the whole forehead to calm the frontalis muscle.
Step 6: Temples
- Purpose: Quiet the nervous system and melt stress—an anchor of soothing facial massage movements.
- Hand position: Pads of index and middle fingers on each temple.
- Movement: Small circles backward (toward the hairline), then forward; finish with a long sweep around the ear and down the side of the neck.
- Reps & time: 8–10 circles each direction; ~45–60 seconds.
- Pressure: 2/5—gentle, rhythmic.
- Avoid: Pressing if you feel a pulse or pain lighten up immediately.
- Pro tip: Sync circles with slow breathing (4-count in, 6-count out) for a mini nervous-system reset.
Step 7: Full-Face Sweeps (Seal & Finish)
- Purpose: Evenly distribute product, promote lymph flow, and “seal” your facial at home step by step routine.
- Hand position: Whole palms or the flat of your fingers.
- Movement: From the center outward and slightly upward—chin to ears, nose to temples, forehead to hairline; finish with downward neck strokes to the collarbone.
- Reps & time: 3–4 slow, continuous sweeps per zone; ~60–90 seconds.
- Pressure: 2/5—glide, don’t drag.
- Avoid: Rushing this close; it’s where the calming effect locks in.
- Pro tip: Blot excess oil with a warm, damp cloth, then press in your moisturizer to complete the home facial.
These facial massage movements form the foundation of a complete facial at home step by step process.
Optional tool add-ons (use after mastering hands)
- Jade roller: Light, outward rolls following the same paths; great over serum for cooling.
- Gua sha: 5–10 degree angle, feather-light pressure; always move out and slightly up, then drain down the neck.
- Cupping (micro facial cups): Short, gliding lifts only never leave cups static.
Common Mistakes to Avoid in Facial Massage
- Using too much oil → can clog pores.
- Skipping patch test → risk of irritation.
- Applying too much pressure → causes skin stretching.
- Ignoring skin type → wrong oils may trigger breakouts.
By following proper face facial tips, you make sure your facial massage with oil is safe and effective.
How Often Should You Massage Your Face?
Experts recommend 2–3 times per week for 5–10 minutes. For sensitive skin, limit to twice weekly. Always adjust your home facial steps based on your skin’s response.
Quick Facial at Home Step by Step (5 Minutes)
- Cleanse.
- Warm 2 drops of oil.
- Jawline sweep.
- Cheek circles.
- Forehead upward strokes.
- Final outward sweeps.
This mini routine gives instant radiance when you’re short on time.
Call-to-Action
Ready to upgrade your skincare ritual? Explore Hudira’s natural skincare insights and learn how to master facial massage techniques safely at home. Follow our website for organic skincare products, expert face facial tips, herbal product guides, and the latest updates in natural skincare. Your journey to radiant skin begins here.
FAQs
Q. Which is the best oil face massage for glowing skin?
Jojoba oil for oily skin, argan oil for dry skin, and rosehip oil for sensitive skin are among the best options.
Q. How often should I follow facial steps at home?
2–3 times weekly is ideal. Adjust frequency for sensitive or acne-prone skin.
Q. Can facial massage with oil reduce wrinkles?
Yes, regular gentle massage boosts elasticity, circulation, and may reduce fine lines over time.
Q. What are the basic home facial steps everyone should follow?
Cleansing, exfoliating, steaming, oil application, massage, and moisturizing.
Q. How to do a facial at home safely?
Choose the right oil for your skin type, apply gentle pressure, and avoid massaging over active acne or cuts.


Add comment