No products in the cart.
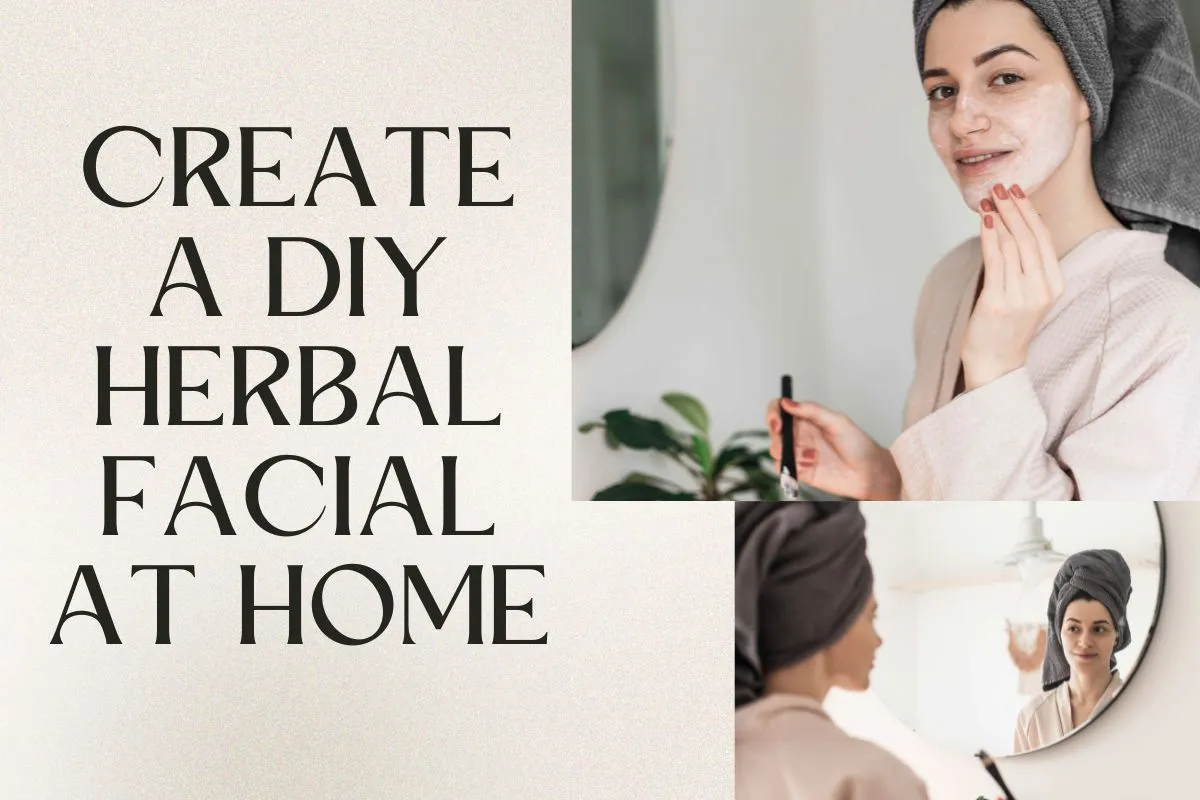
Your Home, Your Spa
A rejuvenating facial at home doesn’t just save money, it nourishes your skin, revives your mind, and reconnects you with nature. When you craft your own homemade facials using herbs and pure ingredients, you take beauty into your own hands free from harsh chemicals or expensive salon visits.
What if your kitchen cabinet held the secret to your healthiest, most radiant glow yet? From gentle exfoliating scrubs to calming herbal steams, your DIY herbal skincare ritual could transform your skin and your mood. Curious how to get that spa-like experience through an at home DIY facial using everyday natural ingredients? Let’s unlock your path to the best homemade facial you’ll ever try.
Why Choose a DIY Herbal Facial at Home?
Creating a facial at home isn’t just about saving money or avoiding harsh ingredients, it’s a deeply intentional act of self-care rooted in natural wellness. With a homemade herbal facial, you not only nurture your skin, but also your sense of balance, ritual, and confidence. Here’s why it’s worth making this soothing practice part of your weekly routine:
1. Control Your Ingredients
When you craft your own facial, you know exactly what’s going onto your skin. No hidden preservatives, artificial fragrances, or questionable chemicals. Every herb, oil, or natural mask ingredient is hand-selected by you.
This is especially important if you:
- Have sensitive skin or allergies
- Want to avoid synthetic or toxic substances
- Follow a halal, vegan, or clean beauty philosophy
You’re in charge. It’s your recipe, your skin, your rules.
2. Budget-Friendly Beauty
Let’s be honest salon facials can be expensive, especially if you’re trying to keep up with a regular skincare routine. A professional facial can easily cost $50–150 per session.
In contrast, homemade facials can be created using ingredients already in your kitchen or garden like turmeric, honey, aloe vera, yogurt, or rosewater. By investing a few minutes and a handful of natural ingredients, you can replicate the glow of a spa at a fraction of the cost.
That’s luxury without the price tag and without compromise.
3. Fully Customizable to Your Skin’s Needs
No one knows your skin better than you. With a DIY herbal facial, you can customize your treatment to address exactly what your skin is asking for whether that’s deep hydration, detox, soothing irritation, or brightening dull patches.
For example:
- Dry skin? Use mashed banana + honey + olive oil
- Acne-prone skin? Try neem powder + turmeric + yogurt
- Dull skin? Go with papaya + oats + rosewater
- Inflamed skin? Opt for chamomile tea + aloe vera
This kind of personalized skincare goes beyond even some professional treatments, making each session uniquely effective.
4. A Calming Self-Care Ritual
In today’s fast-paced world, taking 30 minutes for a self facial is more than just skincare it’s an act of mindfulness. The scents of herbs, the warm steam, the soft touch of applying a mask each moment brings your attention back to yourself.
Even amateur facials become meaningful rituals when done with intention:
- Light a candle or play soft music.
- Use slow, gentle strokes while applying your mask.
- Breathe deeply during your steam to calm your nervous system.
- Reflect or journal while your mask sets.
These peaceful, grounding moments help reduce stress hormones—creating internal calm that enhances your external glow.
Benefits of Herbal Ingredients for Natural Face Care
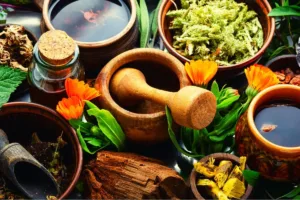
When you choose a facial at home using natural ingredients, you’re embracing the time-honored wisdom of herbal skincare that has been trusted for centuries. Each ingredient serves a purpose, delivering specific benefits to your skin in the gentlest way possible. Take turmeric, for example rich in curcumin, it’s widely known for its anti-inflammatory and skin-brightening properties, helping reduce dark spots and redness. Aloe vera is another hero, offering deep hydration and soothing relief to dry or irritated skin. Meanwhile, chamomile acts as a calming agent, perfect for reducing redness and puffiness, especially for sensitive skin. These botanicals don’t just treat the skin, they heal it from within.
Other potent herbs include rose petals, which naturally tone and soften the skin while minimizing pores, and neem, which is celebrated for its antibacterial properties that fight acne and purify the skin. For those with oily or congested skin, Multani Mitti (Fuller’s Earth) is ideal; it detoxifies, tightens, and deeply cleanses the pores, leaving your face refreshed and balanced. These ingredients are more than beauty staples; they are gifts from nature, rooted in traditional healing systems like Ayurveda. Integrating them into your homemade facials not only supports your skin’s health but also honors the simplicity, purity, and effectiveness of herbal wellness.
At Home Facial Steps: A Complete Ritual

Step 1: Cleanse
Begin your facial at home with a thorough cleanse to remove surface impurities like dirt, oil, makeup, and pollutants that build up throughout the day. This step is crucial for creating a clean base and preventing clogged pores. Instead of harsh commercial cleansers, choose gentle, natural alternatives like raw honey or aloe vera gel. Raw honey not only cleans but also hydrates and has antibacterial properties, while aloe vera soothes and cools sensitive skin.
Apply a small amount to damp skin, massage in circular motions for about one to two minutes, focusing on oil-prone areas like the T-zone. Rinse with lukewarm water and pat dry with a soft towel. This step leaves your skin clean, calm, and ready to absorb the benefits of the next stages in your at home diy facial.
Step 2: Steam
Once your skin is clean, move on to a relaxing herbal steam to open your pores and prepare your skin for deeper treatments. Boil about 3–4 cups of water and add skin-loving herbs such as chamomile for soothing, rose petals for hydration, or green tea leaves for antioxidant benefits. Pour the mixture into a large bowl, then place your face above it with a towel draped over your head to trap the steam. Stay about 10–12 inches away and steam for 5 to 8 minutes while breathing deeply and relaxing.
This gentle heat softens blackheads, loosens dirt from your pores, and increases circulation enhancing the absorption of masks and moisturizers. It’s a calming ritual that not only treats your skin but also brings a moment of peace to your self facial experience.
Step 3: Exfoliate
After steaming, your pores are open and your skin is primed for exfoliation. This step removes dead skin cells and boosts circulation, helping reveal a smoother, brighter complexion. For a homemade exfoliator, mix rice flour with yogurt or oatmeal with honey. Rice flour provides a gentle grainy texture, while yogurt contains natural enzymes that help break down impurities. Oatmeal is ideal for sensitive skin, and honey keeps it moisturized and protected. Massage the scrub onto damp skin in light circular motions for 1–2 minutes, focusing on areas like the nose and chin.
Avoid applying too much pressure, especially if you’re new to amateur facials, to prevent irritation. Rinse with lukewarm water and pat dry. This step leaves your natural face soft and perfectly prepped for your face mask.
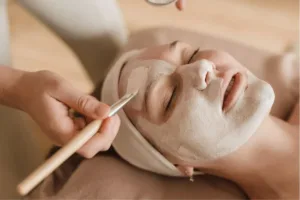
Step 4: Apply Mask
Now it’s time to deeply nourish and treat your skin with a facial mask. Masks are an important part of any facial at home, helping to target specific concerns such as dullness, acne, or dehydration. If you’re looking to revive tired, uneven skin, try Hudira’s Brightening Face Mask, enriched with herbal ingredients to restore glow and clarity. For acne-prone or inflamed skin, Hudira’s Anti-Acne Face Mask is perfect; it purifies, calms, and controls oil without drying out your skin.
To boost radiance and achieve a fresh, youthful look, apply Hudira’s Orange Glow Face Mask, which is packed with natural fruit extracts and soothing botanicals. Apply an even layer of your chosen mask to clean, dry skin, avoiding the eyes and lips, and leave it on for 15–20 minutes. Once it dries, rinse with lukewarm water. Your skin will feel replenished, revitalized, and ready for the final steps in your herbal at home diy facial routine.
Step 5: Tone
After rinsing off your face mask, it’s important to restore your skin’s natural pH balance with a toner. Toning helps tighten your pores, remove any leftover mask residue, and prepare the skin for hydration. Natural toners like rose water are gentle, hydrating, and refreshing, while green tea toner provides antioxidant protection and soothes inflammation. Simply spritz or dab it onto your face using a cotton pad. This step adds a cooling, refreshing touch to your at home diy facial, leaving your skin feeling clean and toned.
Step 6: Moisturize
Once your skin is toned, it’s time to lock in moisture. This is a crucial step to keep your skin soft, smooth, and hydrated after all the cleansing and treatments. Use aloe vera gel if you prefer a lightweight, soothing option especially great for oily or acne-prone skin. For dry or combination skin, apply a few drops of jojoba or argan oil, both of which mimic your skin’s natural oils and absorb easily without clogging pores. Gently press or massage the moisturizer into your skin to complete this nourishing phase of your homemade facial.
Optional Step 7: Massage
If you have a few extra minutes, give yourself a relaxing facial massage using a herbal facial oil or your moisturizer. Using upward and outward strokes, gently massage your cheeks, jawline, forehead, and neck. This boosts blood circulation, promotes collagen production, and enhances the absorption of your products. Plus, it’s an incredibly calming way to end your self facial, turning your amateur facials into a spa-like ritual that supports both your skin and your peace of mind.
Herbal Face Recipes for Different Skin Types
| Skin Type | Ingredients | Recipe |
| Oily Skin | Multani Mitti, neem, rose water | Detoxifying clay mask |
| Dry Skin | Banana, honey, almond oil | Deep moisturizing mask |
| Acne-Prone | Neem powder, yogurt, turmeric | Anti-inflammatory mask |
| Dull Skin | Papaya, lemon juice, oats | Glow-boosting enzyme mask |
Incorporate these once a week into your facial at home routine for visible improvement.
Mindful Tips for a Self Facial Spa Experience
- Play calming music
- Light a candle or use essential oils
- Practice slow, intentional breathing
- Visualize your skin glowing with each step
At home, diy facial routines aren’t just skin-deep, they’re moments of mindfulness and self-love.
Common Mistakes to Avoid During Homemade Facials
- Over-steaming (5–8 minutes is enough)
- Using harsh scrubs more than 2x/week
- Applying masks on broken or irritated skin
- Skipping the patch test for new ingredients
Why Hudira Recommends Herbal Over Chemical Facials
At Hudira, we believe that skincare should be as pure as your intentions. By opting for a facial at home using natural ingredients, you protect your skin barrier, reduce toxin exposure, and let your skin breathe naturally.
Check out our botanical skincare line to complement your DIY journey.
Ready to Glow?
Now that you know how to do a facial at home, it’s time to put it into action. Open your kitchen, light a candle, and give your skin the herbal spa treatment it deserves.
FAQs:
Q. What to add in steam for your face?
Use herbs like chamomile, mint, rose petals, green tea, and neem leaves.
Q. How to steam your face at home naturally?
Boil water, add herbs, and lean over the bowl with a towel over your head for 5–8 mins.
Q. How often should I do a facial at home?
Once a week is ideal for most skin types.
Q. What’s the best homemade facial for glowing skin?
A turmeric, honey, and yogurt mask with a rosewater toner works wonders.
Q. Can I use Hudira products with my homemade facials?
Absolutely! Our products are designed to enhance your herbal skincare rituals.


Add comment